PDF Templates
Kollengo uses a powerful combination of HTML/CSS for layout and LiquidJS for dynamic content to generate professional PDFs. This approach gives you pixel-perfect control over your contracts while ensuring they are dynamically populated with deal-specific data.
How PDF Generation Works
Unlike drag-and-drop editors that limit your creativity, Kollengo templates are code-based.
- Template: Written in HTML with CSS for styling.
- Logic: LiquidJS tags are embedded to handle variables and conditions.
- Data: JSON data from your deal (Products, Clauses, Customer info) is injected.
- Rendering: The system renders the HTML, executes the LiquidJS, and uses Puppeteer to “print” the final DOM to a PDF file.
The Template Designer
The Template Designer is your workspace for building and testing templates. It features a real-time split view:
- Code Editor: Write your HTML and LiquidJS here.
- Test Data: Input JSON data to test your template against different scenarios.
- Preview: See valid HTML and an accurate PDF render in real-time.
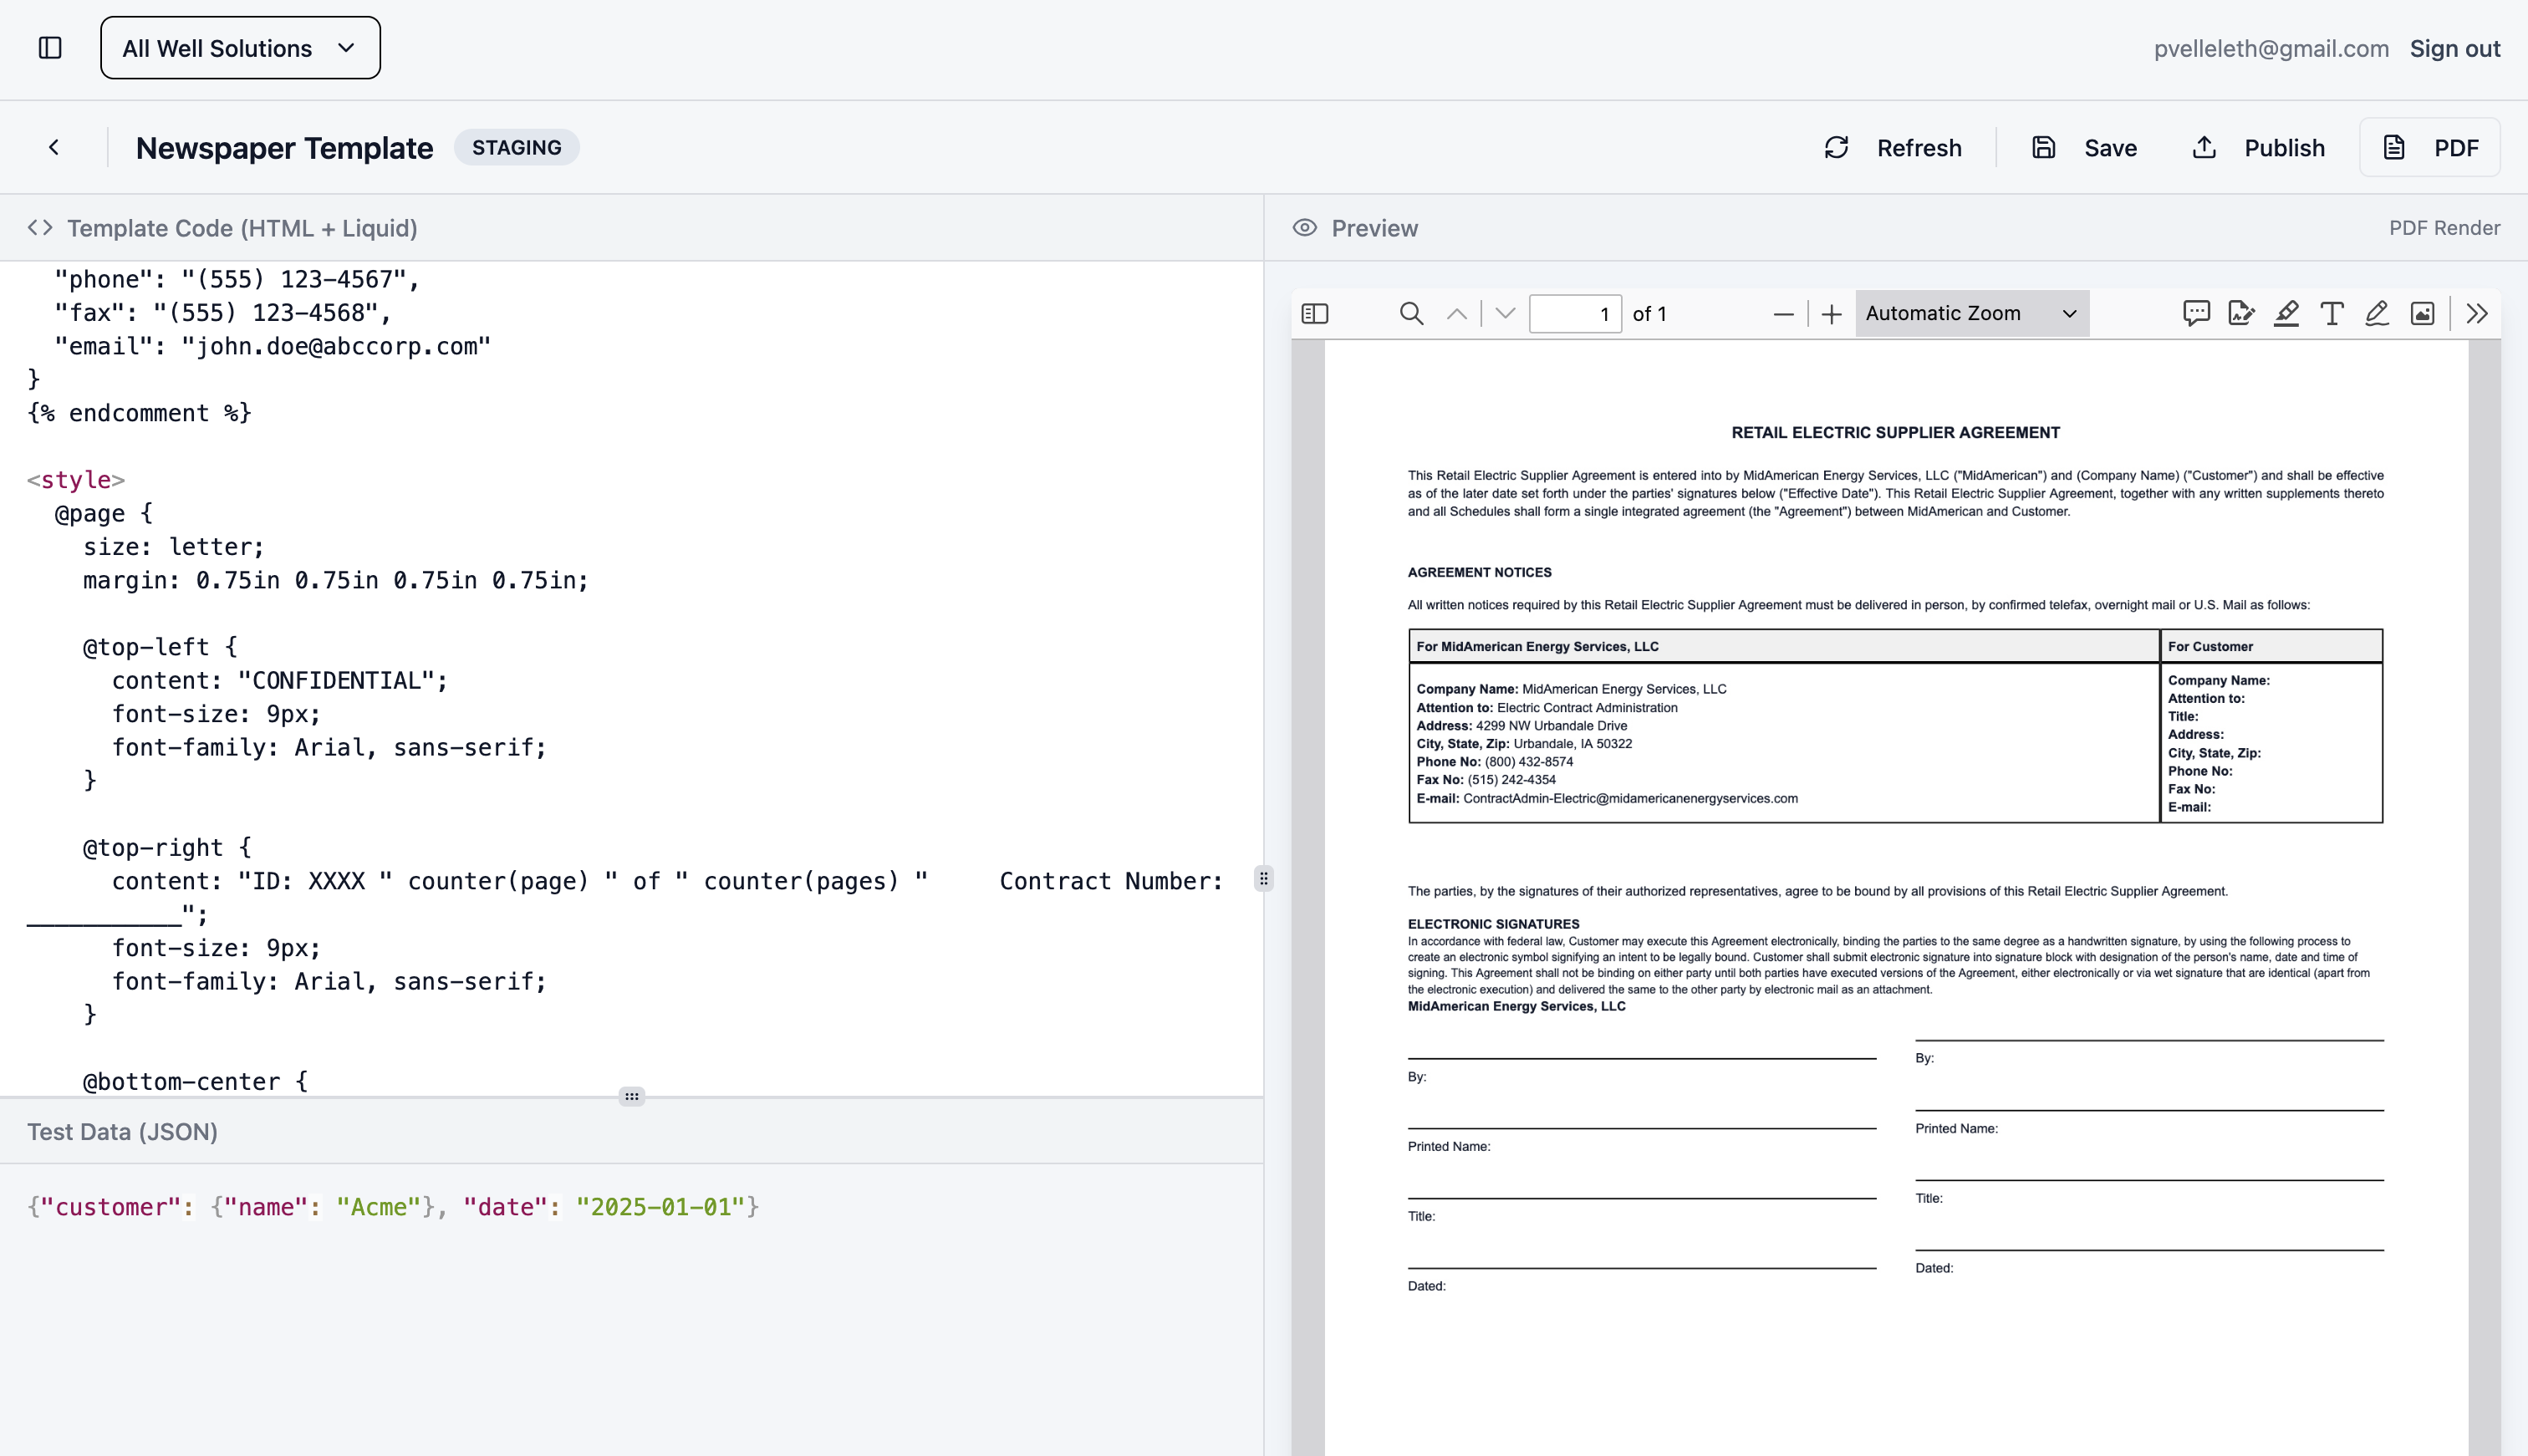
[!TIP] Use the Staging and Production modes to safely test changes before they go live.
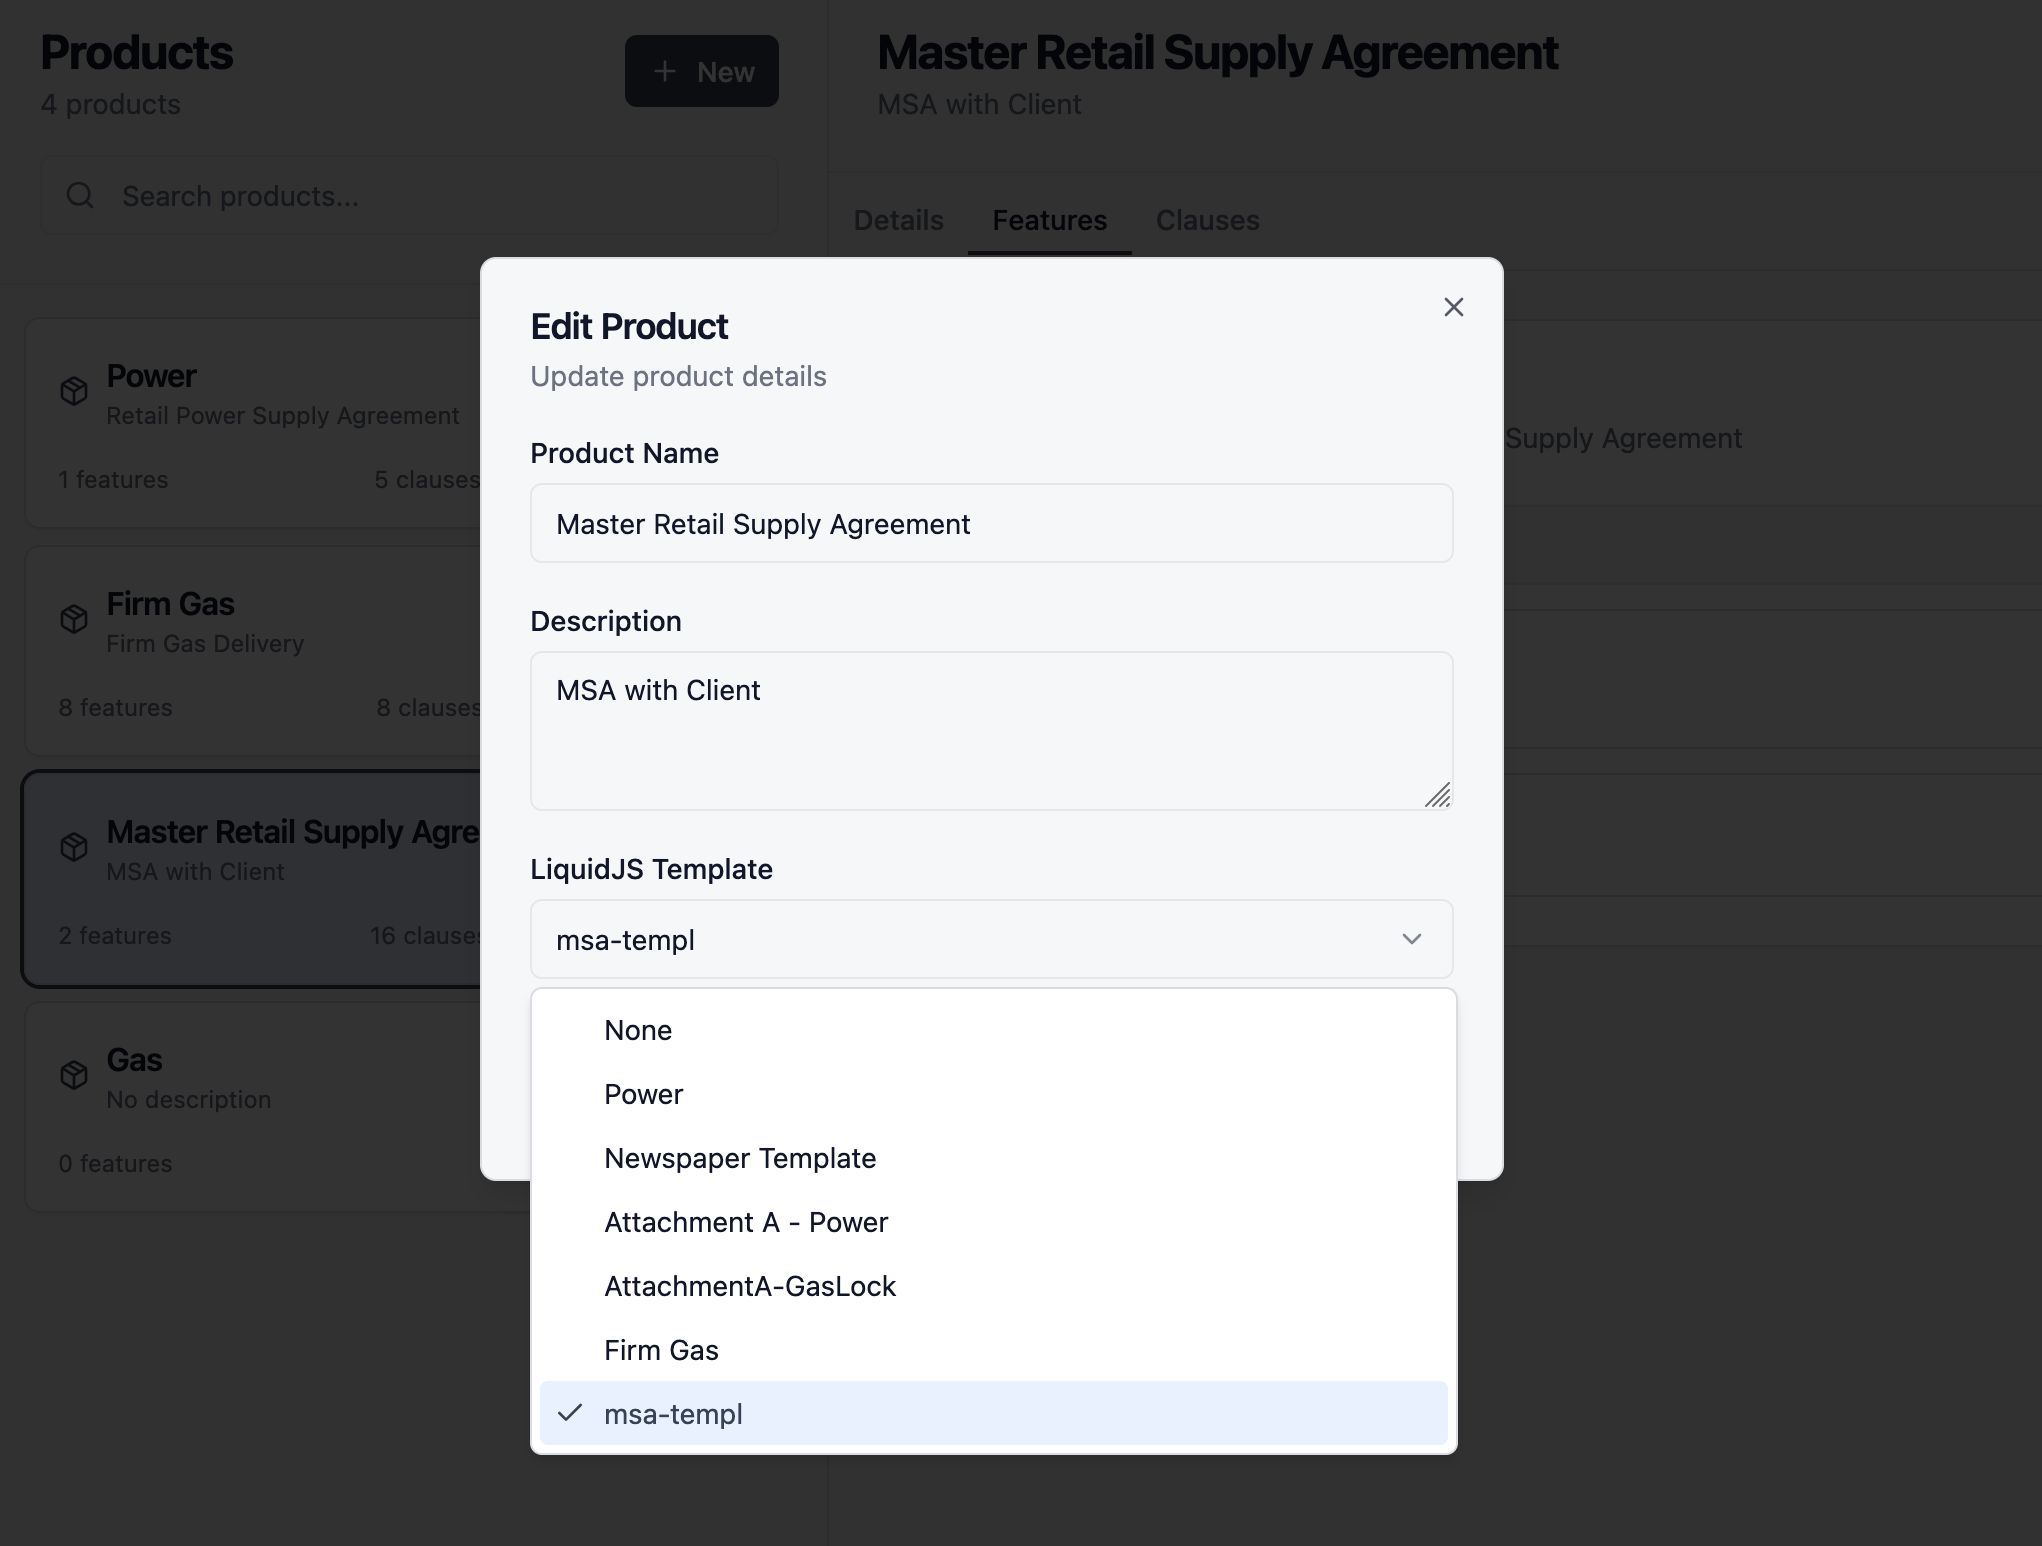
Connecting Templates to Products
PDF templates are connected directly to a Product. When you configure a Product in Kollengo, you select which PDF Template should be used to render its contracts. This decoupling allows you to update your brand’s look and feel across all related products by simply editing a single template.
Dynamic Variables
Inject data into your templates using LiquidJS double curly braces {{ }}.
Basic Substitution
Access nested properties in your data object using dot notation.
<p>This agreement is made on {{ data.contract_date }}.</p>
<p>Prepared for: <strong>{{ data.customer.name }}</strong></p>
Formatting (Filters)
Use pipes | to format data, such as dates or currency.
<!-- Date Formatting -->
{{ data.created_at | date: "%B %d, %Y" }}
<!-- Output: January 05, 2026 -->

<!-- Text Manipulation -->
{{ data.customer.name | upcase }}
<!-- Output: ACME CORP -->
Conditional Logic
Control what content appears in the PDF based on the data. This is perfect for optional clauses, conditional pricing, or region-specific terms.
If/Else Statements
{% if data.contract_value > 10000 %}
  <div class="premium-terms">
    <h3>Premium Service Level Agreement</h3>
    <p>Includes 24/7 dedicated support.</p>
  </div>
{% else %}
  <div class="standard-terms">
    <h3>Standard Service Level Agreement</h3>
    <p>Includes standard business hours support.</p>
  </div>
{% endif %}
Loops (For Arrays)
Iterate over lists of items, such as line items in an invoice or a list of selected features.
<table class="items-table">
  <thead>
    <tr>
      <th>Item</th>
      <th>Price</th>
    </tr>
  </thead>
  <tbody>
    {% for item in data.items %}
      <tr>
        <td>{{ item.name }}</td>
        <td>{{ item.price }}</td>
      </tr>
    {% endfor %}
  </tbody>
</table>
See the LiquidJS documentation for more information on LiquidJS.
Styling Your PDF
Since the templates are standard HTML, you can use standard CSS for styling.
<style>
  /* Use @page to define paper size and margins */
  @page {
    size: A4;
    margin: 20mm;
  }

  body {
    font-family: 'Helvetica', sans-serif;
    font-size: 11pt;
    line-height: 1.5;
    color: #333;
  }

  .header {
    border-bottom: 2px solid #000;
    margin-bottom: 2rem;
  }
</style>
Troubleshooting
- Preview isn’t updating? Click the “Refresh” button in the top toolbar to force a re-render.
- Data not showing? Ensure your
{{ variable }}matches the structure of your JSON in the “Test Data” panel. - Layout issues? Remember that PDF page breaks can be tricky. Use
page-break-inside: avoid;in your CSS to keep related content together.